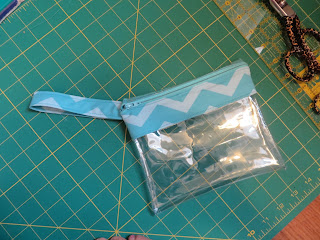
Facebook is a dangerous place.
One of my friends posted this seemingly innocent little project involving clear vinyl, zippers and strips of leftover fabric.
Yeah, I have all of those things.
http://negligentstylee.blogspot.com/2014/01/tutorial-scrappy-vinyl-pouches.html
Then I saw the beautiful rainbow of little vinyl pouches, and I was screwed.
So I needed to make them.
From ALLLLLLLLLL the colors.
I need them.
To be organized.
I can't be organized without a billion of these cute little vinyl bags.
The problem arose when I actually started trying to make one from the tutorial. It involved too much brain power.
I have a Bachelor's in Biology, I minored in Chemistry. Metric shouldn't be that big of a problem for me, but I have two small children, and when I found this project, we had had the stomach flu running through our house for two weeks. My brain was done.
I can't metric today.
My blondness = your gain. Here I present my own twist on this project, which really isn't all that different, except it's in Imperial measurement the entire time. (Please go read the original, she has some great hints on working with the vinyl).
Materials:
Scrap of cotton quilter's fabric (I used 1/8 yd, but you really only need about a 4" x 20" piece)
Zipper (7" or longer - you can cut down a longer zipper, that's what I did)
Clear vinyl (about 1/4 yd will get you several pouches - I think mine was about 12 gauge, but since I found it in my vinyl box in the garage from 10 years ago, it's really anyone's guess as to what it is)
Thread
Zipper Foot
Scotch Tape
KAM Snap and pliers (entirely optional)
Procedure:
Gather up your supplies. If you are using a zipper that is longer than 7", you'll need to cut it down. I'm using the aqua zipper in this picture, and cutting it down to the size of the beige one.
For my fabric, I cut one piece that was 4" wide by about 9", a piece of vinyl that is 9" x 12", a piece of fabric for the strap that was 3" x 12" and a small scrap to cover up where I used a pen on the zipper.
Oh look, I found all my 7" zippers after I got the longer one trimmed down.
Figures.
So, take both of the strips of fabric that you've cut and fold them in half. Press. Fold the raw edges in to the center and press again. This will encase the raw edges.
On the narrower piece, topstitch on both edges to make the strap. I didn't get a picture of this. Whoops
If you were heavy handed on the ink, you'll want to cover up the ink by sewing a tiny piece of fabric on the end so the ink is covered up. Don't bother if you didn't hack down a longer zipper.
Here's the end result, covering up the ink spot.
Pin the folded edge of the fabric on the lower side of the zipper, break out your zipper foot, and top stitch the fabric in place.
Ta DA! Trim the fabric along the length of the zipper.
Pin the vinyl in between the pressed edges of the fabric and topstitch along the edge.
Roll the right side of vinyl around and make it flush with the raw edge of the zipper. I use binder clips to pin it to avoid pin holes.
To keep the machine from eating the vinyl, put some tape on the bottom of your zipper foot, and the throat plate of the machine.
 |
| There's tape, you just can't see it. |
Using the binder clip, put the handle in place on the edge of the zipper. ***Leave the zipper open a bit so you can get it open later. Trust me.
Stitch up the other short side and trim the seams down.
Add snaps if you feel like it. The purpose of this is explained in the original tutorial. I kind of like having the option.


